Personnel
Getting started
In order to get started in using the Personnel Module, you first need to populate your Dimensions and then ‘seed’ your model with planning data
Dimensions
You will need to load content into the following dimensions.
The data structures required are available by clicking the links below
· Employment Type (per.Personnel_Employment_Type)
· Position (per.Position)
· Cost Centre (per.Cost_Centre)
· Custom Personnel Dimension
This content is loaded using the Maintain Dimensions documentation, please refer to this as required to load your dimensional data (metadata)
Navigation:
CorePlanEPM – CorePlan+>2. Revenue & Cost Planning>Personnel Planner
The following table summarizes the Personnel model with requirements and a suggested task order.
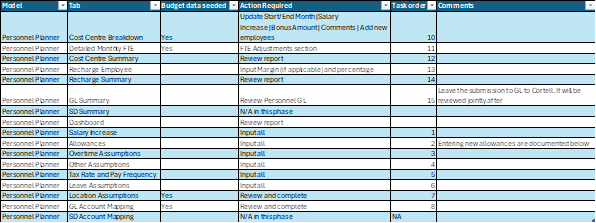
While some input tabs are self-explanatory, others require more direction. The Following tabs are covered in more detail below:
· Cost Centre Breakdown
· Detailed monthly FTE
· Recharge employee
· Allowances (including set up of new allowances)
· GL Account Mapping
Cortell has seeded the Personnel model with data supplied by Nauru in the following Tabs
· Cost Centre Breakdown
· Detailed Monthly FTE
· Location Assumptions
· GL Account Mapping
This data is to populate the model for pre-testing, and all will need to be adjusted by Nauru.
Allowances
Maintaining (adding) the allowances requires you to go into the administration section of the model.
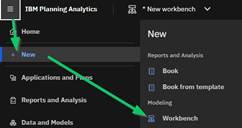
1. On the main page select New>Workbench from the menu
2. In the cubes section search for per.Personnel, expand the dimensions and double click on the per.Personnel_Measure dimension
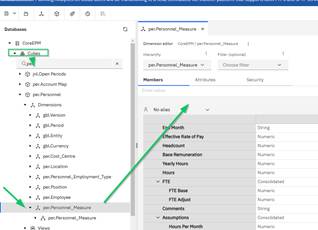
3. In the dimension editor on the right, navigate to the allowances section
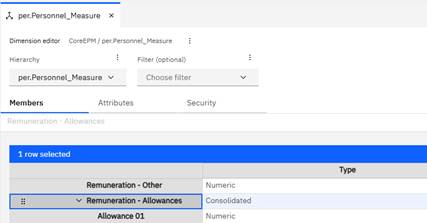
4. The allowances are numbered, with the descriptions displayed at the reporting level.
Add a new allowance to the consolidation by navigating to Remuneration – Allowances go to the last allowance in the list, then clicking Add>After Selection
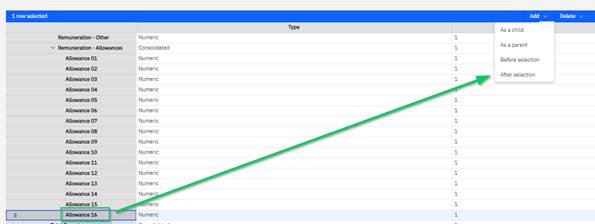
5. Enter your allowance name following the existing convention for allowances: Allowance +2 digit number, i.e 01] i.e. Allowance 17 and press commit
6. Go to the Attributes tab of the dimension editor and fill in all attributes
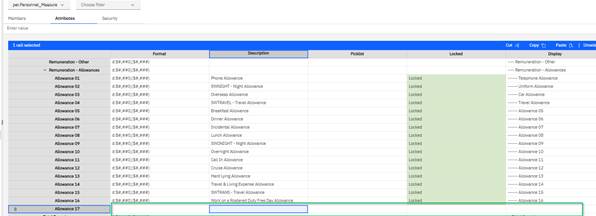
You can copy down from the previous line
Review
For each cost centre, review, but do not change, all loaded data for:
· Yearly Base Remuneration (changes are explained below)
· FTE Base (changes are made in the Detailed Monthly FTE tab)
Update
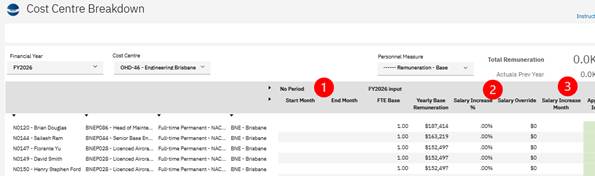
1. Employment can be started or ended for an employee by updating the Start and End Month
2. Salary can be increased in one of two ways, by entering
o Salary increase percent OR
o Salary override
3. The Salary Increase Month will start the salary increase
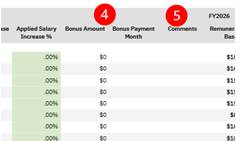
4. Enter a bonus amount and a start month
5. Enter any comments applicable to the employee and the changes made
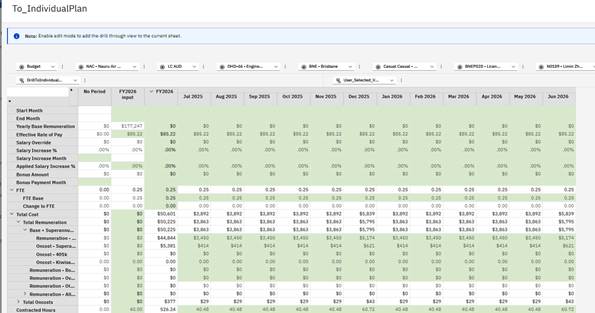
Drill through to individual plan (review only)
Drill to detailed individual plan: right click on a cell in the table, then select Drill through > ToIndividualPlan.

This will show the full detail for a given employee. This should be reviewed after all details have been entered.

Assign new Employee to the Cost Centre:
- Select the Cost Centre from the top selector.
- Fill the parameters in the "New Employee Parameters" table.
- Click the "Add New Employee" button at the top.
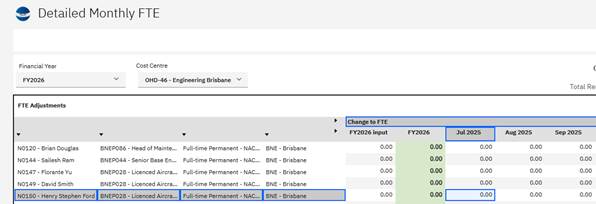
Enter adjustments in the month that you require a change, for example if the FTE is currently 1, and you want to reduce it to .5 from September, enter-.5 in the Change to FTE section in September
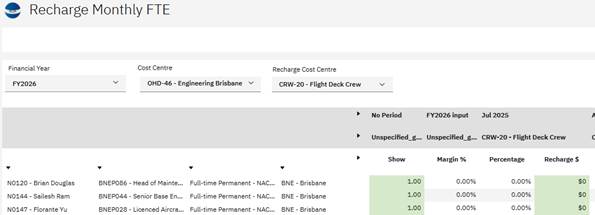
For a given Cost Centre / Recharge Cost Centre, enter a Margin % (where applicable) and a Percentage
1. General Administrative components
a. Maintain Dimensions
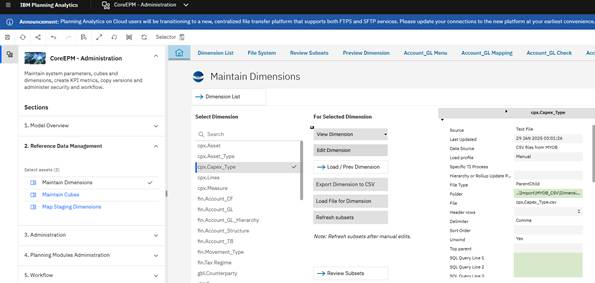
While the Maintain Dimensions page also accepts ODBC connection, the Planning Model at Nauru Dealt with csv file only, and the configuration of flat files will be covered in this document.
When using the Dimension editor at Nauru, you will find that all dimensions that are needed have already been configured for you and in most cases, you will just need to accept the defaults and refer to the Using the Drive explorer section below
Refer to CoreEPM Readiness_Data Requirements - CorePlan+.docx as supplementary data for this guide
1. In the Select Dimension pane on the left, select the dimension that you want to load
2. In the right pane, all selections have been filled for you, however below is an explanation of the relevant selections
a. Source. Text File, ODBC or Manual.Text File is used exclusively at Nauru
b. Data Source. CSV files from MYOB is used here. You will find the folder for these files in the Folder field
c. Load Profile. Set to manual
d. File Type. ParentChild. Refer to the data readiness document on page 13 for a description of the ParentChild type. This is the simpler of the two formats and was used at Nauru
e. Folder. Is determined by the selection in Data Source. To upload or update a file, see the Using the Drive explorer section below
f. File. Enter the name of the file including the file type extension.
g. Header rows. The files at Nauru have all had a single header row
h. Delimiter. The files at Nauru have all been .csv
i. Sort Order. Leave blank
j. Unwind. Leave set as yes
k. Top Parent. Leave blank