A quick review of the key changes:
Key call outs in this release
- Open Process Error logs directly from the server log
As a modeler, you can now open a Process Error log directly from the server log
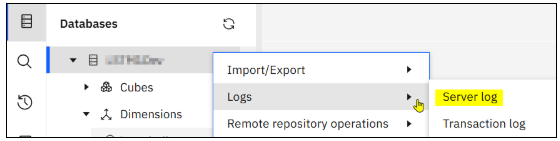
To open the process error log, click on the error log filename (TM1ProcessError_timestamp_processname.log) in the server log.

No need to go to Process Error log folder to get the details any more!
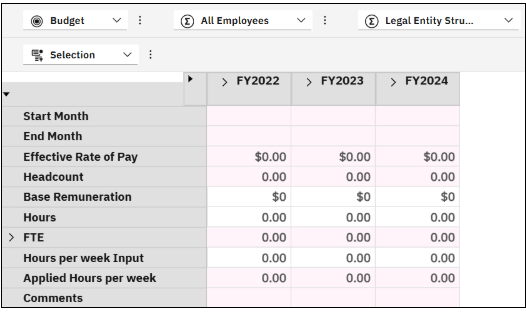
- Customise cell colour based on data state
The Color cells by data state will allow customisation of a cell’s colour in an exploration view based in its data state. You can change the back-ground colour for rule-derived, read only and Sandbox cells.
To enable the Color cells by data state property, follow these steps:
-
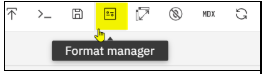
- Select a view and click Format manager on the toolbar
-
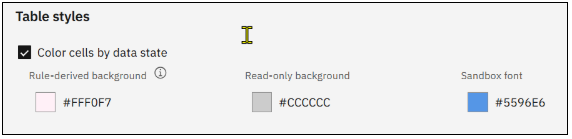
- Select the Data area on the view tab
- In the Table styles section update the colours as required
-
- Click Apply when done
No more cube views with morbid green rules!
Note:
- Rule derived cells include cells with rule-derived values, calculations and set consolidations. The Color cell by data statedoes not apply to Consolidated values
- The Color cell by data stateis not retained if the cube view is saved to the server, but it is retained if it is saved in a book.
Changes in modeling
- Copy menu added to the modeling workbench
A Copy menu has been added to the context menu for dimensions in the Database tree.
This allows you to copy different partes of the member and hierarchy scripts to the clipboard which will assist you in editing MDX, rules and TurboIntegrator processes.
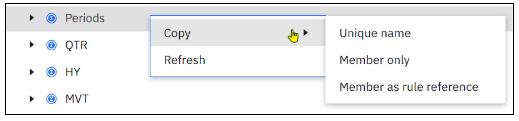
To use the functionality, right-click on a member or hierarchy in a dimension tree and select one of the following objects:
Unique name: Copies the unique name which is used in MDX. e.g. [gbl.Period].[gbl.Period].[Periods]
Member only: Copies the member which is used in rules and TurboIntergrator processes. e.g. Periods
Member as a rule reference: Copies the member as a rule reference which is used in rules. e.g. ‘gbl.Period’:’gbl.Period’:’Periods’
- Generate pick lists for selected cells in a cube viewer
You can now create pick lists in a cube viewer by selecting one or more cells.
Note this functionality does not apply to:
-
- Rule based calculations
- Consolidations
- Read only cells
- Cells are a mixture of string and numeric
To use this functionality:
- Select the cell(s) to be included. If the selection is not valid the Set picklist option will not appear
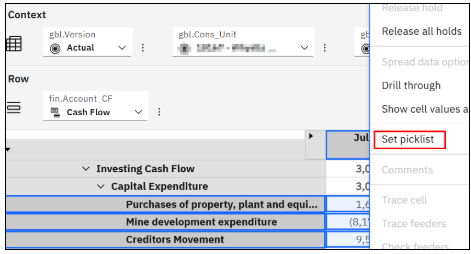
- Click the Set picklist option and then select one of the following:
- None – to clear the pick list if it already exists. To clear an existing pick list first select either Static or Hierarchy then go back to None to clear it
- Static– to specify the pick list values
- Hierarchy– to use all hierarchy members or a subset of members as pick list values
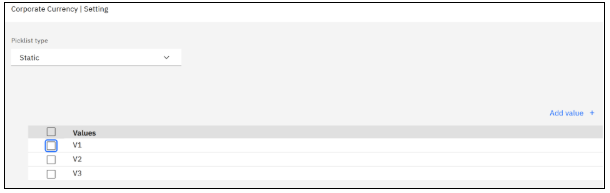
- If the Static type is selected, the dialog box that appears will be determined by cell data type
The following dialog box is displayed for string cells. Click Add Value to specify the pick list value
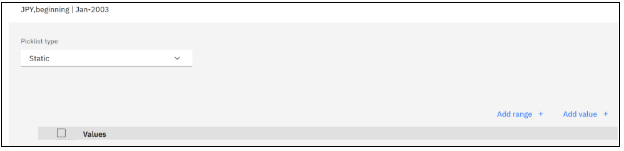
The following dialog box is displayed for numeric cells. In this case, you can click Add Value to add the individual values or click Add Range to specify value ranges.
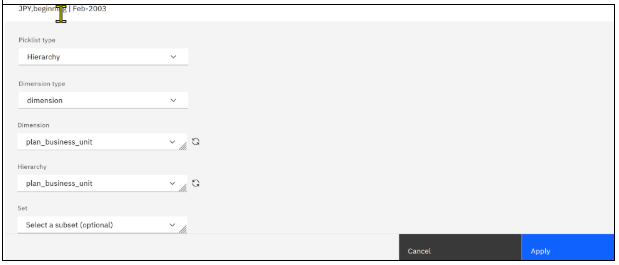
- If the Hierarchy type is selected, the following dialog box is displayed. First select the dimension to be referenced, then the hierarchy and subset if applicable
Note: This new Pick List functionality is only applied to the cube view and range of cells selected at the time of creation.
If a new element is inserted into the range or in the example above a new Cons Unit is selected the Pick list is not displayed
- Increase the flexibility of baseline forecasts but allowing users to override default sets
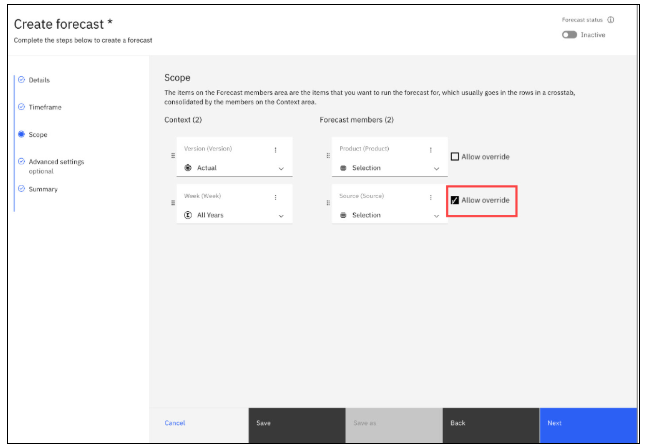
An Administrator or Modeler can now set an option to allow users to override default forecast members and specify a custom scope when running a baseline forecast.
To enable the override functionality, select the Allow override option when defining the scope of the baseline forecast
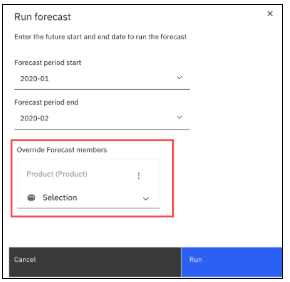
When a user runs a baseline forecast with the option enabled, they can used the Override Forecast members option to change the set to be used. The custom selection is applied on at run time
- Control logging levels (TM1 Database 12 only)
You can now specify logging level for individua loggers in Planning Analytics Administration on TM1 Database 12
The available logging levels are:
- Off– No logging
- Debug– Detailed technical messages, useful for debugging the database
- Info– This is the default logging level. It provides informational messages on the Database such as the normal actions
- Error – An error condition that you should be aware of. Action should be taken in these circumstances
To set the logging levels:
- Open Planning Analytics Administration
- Click the database to be updated
- Click the logging tab
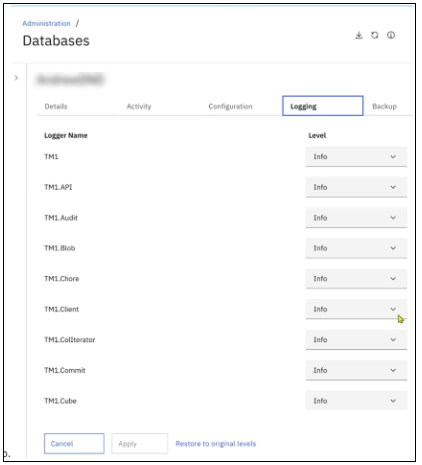
- Select the desired level from the Level dropdown list for each logger. Setting the level for a parent logger e.g. TM1 will set it for every child under that logger. If you set a level for a child before setting the parent it will be retained regardless of what is set for the parent.
- Click Apply after you’ve set all the desired logging levels.
- Change the search scope in the set editor
The set editor now includes options to configure the element search so it either returns the current set or all the current set members and their descendants
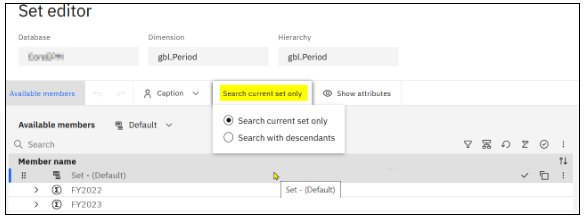
The default setting is Search current set only. To include the descendants of members when searching or filtering, select Search with descendants from the Search drop down list.
- Expand and collapse levels in the set editor
The set editor now includes a button to expand or collapse all consolidations at once up to the selected level
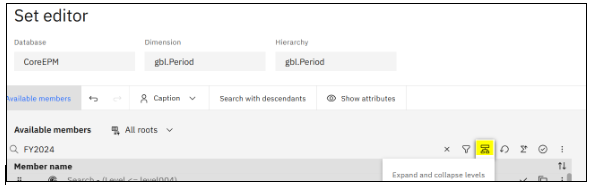
Level000 equates to All roots in the Available members dropdown list
- Export options in books
The export option for a cube, cube view, dimension or dimension hierarchy are now available from the Data Tree under a book in the same way they are available from the Database list on the Workbench.
To export data from a cube or a cube view
- Right click the cube in the Data Tree
- Click on Import/Export> Export data >Next or Export data for a cube view
- Select the view to be exported and dimension details
- The set and /or members to be included in the export
- A range of numeric or string values to include in the export
- Whether consolidated, rule-derived, or zero value items are to be included
The exported CSV file will be saved to your local Downloads directory.
To export a dimension:
- Right click the dimension in the Data Tree
- Click Export members
- Select a hierarchy
- Add a file name then click export
The export file will include:
- Element name
- Parent/child relationship
- Element Type
- Weight
- Attribute details including identifying whether they are string or numeric
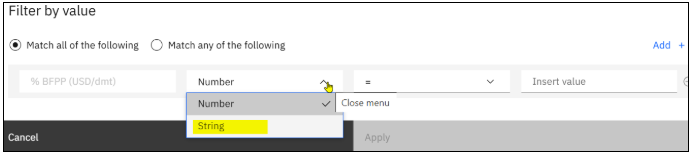
- Create filters based on string values
The Filter by value filter in the cube viewer now supports string values, in addition to the already supported numeric values.
To use the functionality,:
- Open a view with string values
- Right click on the column or row header, select Filter>Filter by Valueand then select String from the drop down list
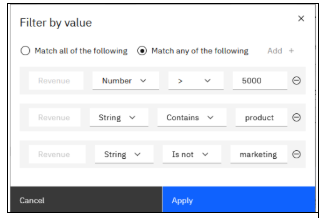
- The filter icon is applied to a row or column where a filter is applied
You can create filters with mixed numeric and string data as shown in the example below
- Manage data entry and data spreading in consolidated cells
You can now allow or prevent data spreading when values are entered in consolidated cells in a view. When data is entered directly into a consolidated cell, it is proportionally spread down through the view.
To prevent this type of spreading from happening accidentally, an option to allow or prevent the action is now available. The option is set as a property of each view in a book.
To manage the ability to enter data directly in a consolidated cell in a view:
- Open the applicable book in Edit Modefrom the Reports and Analysis folder
- Navigate to a view to be updated
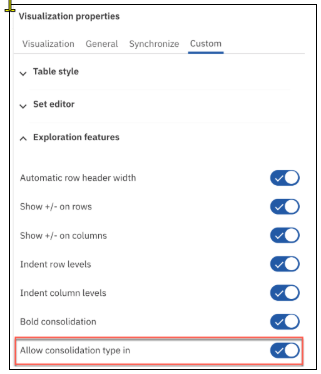
- Click Properties >Custom>Exploration features
- Toggle theAllow consolidation type in option
When the Option is enabled (ticked), direct entry into a consolidated cell can occur
Important to note: Regardless of the Allow consolidation type in setting, you can right click any consolidated cell in a view , then click Spread data options to apply data spreading
- New sorting options for view and sets in the Database tree
A new folder structure in the database tree now lets you sort view and sets into Public and Private folders. It is available in books and the modeling workbench.
To set this up:
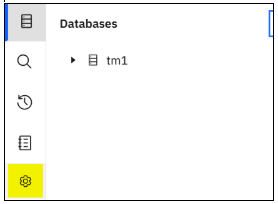
- From the Workbench, click on the Database Tree settings
- In the Personal menu,click Profile and Settings
- Click Settings, under theDatabase tree select Split objects into Private and Public folders and then click Save and Close
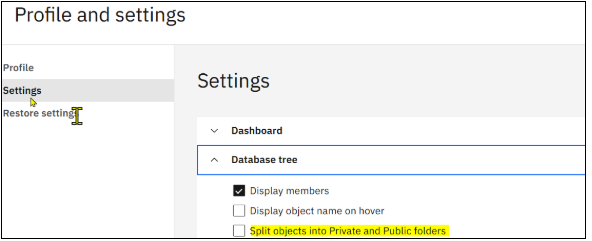
You should now be able see the private and public folders in the Database tree and you can sort the views and sets into these folders
GQ – At the time of writing the Private and Public folders were not showing
- Support for parameters in Planning Analytics Workspace MDX editor
You can now parametrise MDX queries in Planning Analytics Workspace
The default MDX generation uses a query state, which consists of the sets of each hierarchy, member selections for hierarchies on titles, any applied operations (e.g. expand, collapse, sort, etc).
The query state generates an MDX query to retrieve the corresponding axis and cell data from the TM1 database.
A parameterised MDX involves the use of an MDX template. This template allows you to override how the query state is used to generate the MDX. An MDX template contains the following:
- Variables that can be substituted during MDX generation.
- Variable declarations that define the members or sets in the query state which are substituted for the variables in the MDX template.
Supporting parameters allow for more control over the MDX. while allowing the view to respond to the specified member and set synchronisation events based on how the template is defined.
The following variables can be defined in an MDX example:
Set variables
These define a reference to set a set for a hierarchy defined in the query state
e.g. { “Name”: “<0>”, “HierarchyID”: “[plan_time].[plan_time]”, “Type”: “SetVariable” }
Slice member variables
Slice member variables define a reference to the selected member for the query state.
e.g. { “Name”: “<2>”, “HierarchyID”: “[plan_version].[plan_version]”, “Type”: “SlicerVariable” }
Set member variables
Set member variables define references to members of a set at a specified index.
e.g. { “Name”: “<1>”, “HierarchyID”: “[plan_chart_of_accounts].[plan_chart_of_accounts]”, “Type”: “SetMemberVariable”, “Index”: 0 }
MDX template example
The following is an example of a complete MDX template:
{ ”MdxTemplate”: “SELECT {<0>} ON 0, {<1>} ON 1 FROM [plan_BudgetPlan] WHERE (<2>, [plan_business_unit].[plan_business_unit].[10110])”, “Variables”: [ { “Name”: “<0>”, “HierarchyID”: “[plan_time].[plan_time]”, “Type”: “SetVariable” }, { “Name”: “<1>”, “HierarchyID”: “[plan_chart_of_accounts].[plan_chart_of_accounts]”, “Type”: “SetMemberVariable”, “Index”: 0 }, { “Name”: “<2>”, ”HierarchyID”: “[plan_version].[plan_version]”, “Type”: “SlicerVariable” } ] }
How to parameterise an MDX query
To parameterise an MDX query, complete the following steps:
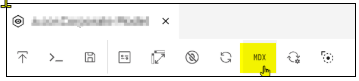
- In the cube viewer, click the edit MDX icon [Alt: Edit MDX icon] to access the MDX.
- Click the MDX template variables icon [Alt: MDX template variables icon]. The MDX parameters dialog box opens
- To add a parameter, click the Add Parameter button and set the following options:
- Name: The parameter ID. The name can only consist of numeric values
- Dimension: The dimension to define in the parameter.
- Hierarchy: The hierarchy to define in the parameter.
- Type: The type of variable to define in the parameter. You can choose a Set, Set member or Slicer variable
- To add the current parameter to the list and create another parameter, click Add
- To add the current parameter to the MDX and close the MDX parameters dialog box, click Add and close.
- ClickDone
Known limitations
There are a few current known limitations with MDX templates:
- Apart from the defined variables, MDX template views are read-only. They do not respond to events that change the structure of the query (e.g. pivoting, expand, collapse, sort, etc)
- MDX template views only respond to the member and set synchronisation events they are parameterised to respond to.
- Metadata change recovery is only applied to sets and members referenced by variables.
Changes in Applications and Plans
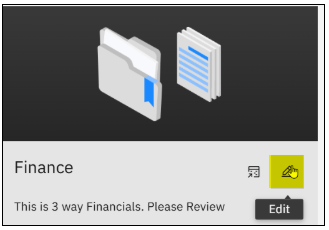
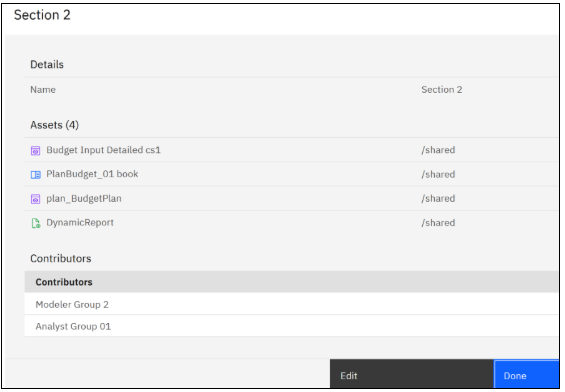
- Summary pages in Applications and Plans
Sections in the Applications and Tasks in Plans now have a summary page which provides a concise view of the assets the section/task contains.
To view the summary details for an application:
- Click the Edit to the right of the Application in the Applications and Plans list or the Edit box on the Application widget
- Expand the section to be reviewed and click on the Summary link to show the details
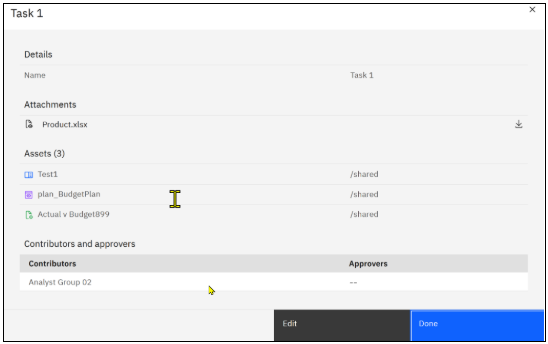
- For a plan, click the Edit to the right of the Plan in the Applications and Plans list or the Edit box on the Application widget
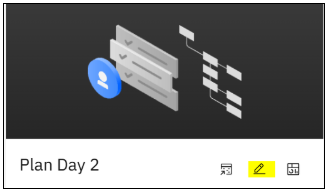
- Expand the task to be reviewed and click on the Summary link to show the details
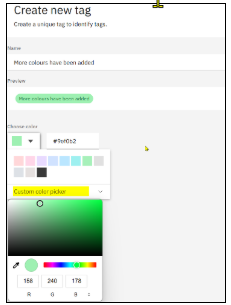
- Custom Colour picker for tags
You can now select a custom colour when adding tags to an Application or Plan
Changes in books and reporting
- New design for Action Button configuration
The configuration of the Action button, used for running processes, navigation and triggering AI jobs, has changed. All the activities are now shown under the Configure tab
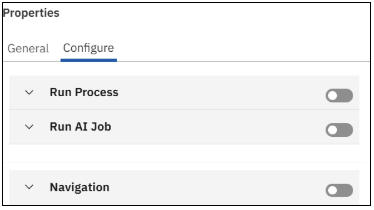
Simply, expand each section to see the available options.
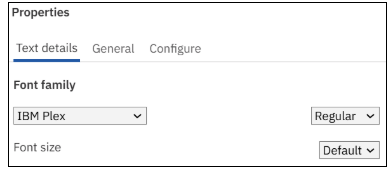
Click inside an Action button to see Text details
- Advanced Action Button configuration for TurboIntegrator processes and navigation
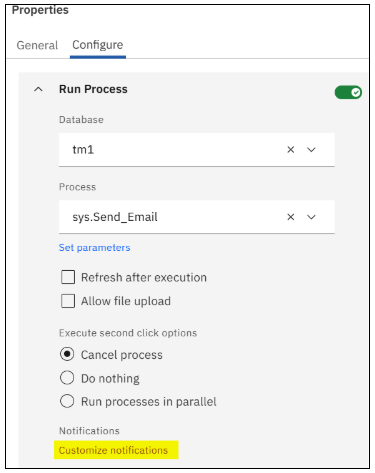
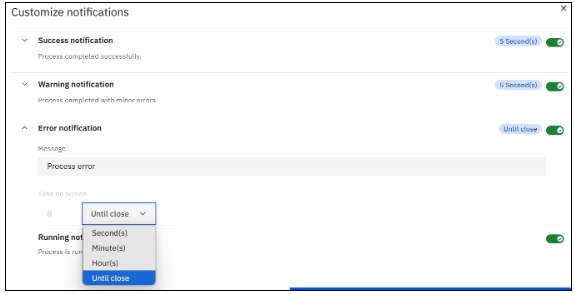
Run Process – Custom Notifications
You can now configure custom notifications to display when running a TurboIntegrator Process from an Action Button.
To do this, click on the Customize notifications
On the Customize notifications screen, the messages for the first three notifications can be changed and if necessary the times the messages remain on the screen can be extended by seconds, minutes or even hours
Navigation changes
The Navigation buttons can now be used after a TurboIntergrator Process has been run to:
-
- Navigate to a tab in the current book
- Navigate to a new book
- Navigate to a different site using a URL
- or, do nothing which is the default
The timing for these navigation steps can be immediately, after the process completes or if process completes with an error
- Add cell values as parameters in TurboIntegrator processes that are run from an Action button
You can now pass cell values a parameters in processes that run from an Action Button
To add cell values as process parameters:
- In edit mode, select the button you want to configure
- Go to Properties,enable Run Process and select the database and process
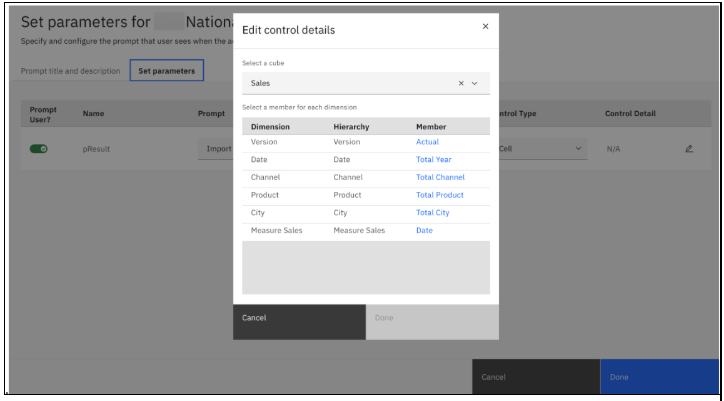
- Click Set Parametersand update the Prompt details – these will appear when the Action button is triggered
- Select Cellas the Control Type
- ClickEdit and select a cube and the member for the cell value intersection. The parameter and cell value types must match. For example they must both be numeric or string
If the cell value in a cube viewer or single cell widget is changed the updated cell value is reflected in the process parameters
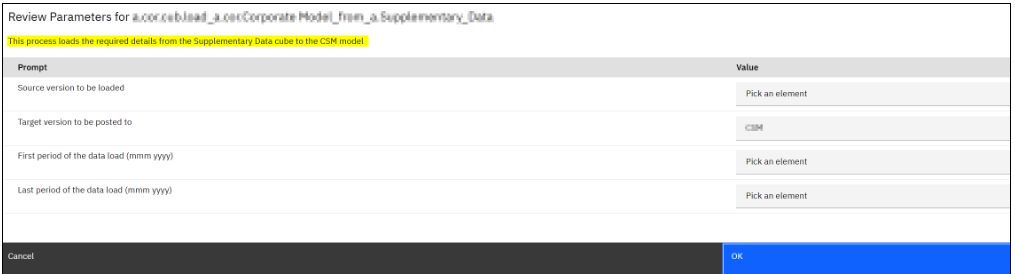
- Customise Action Button parameter title and description
As mentioned above you can now add a description to the TI Process when using an Action Button. It will appear as shown below
Follow the first three steps above to add the details
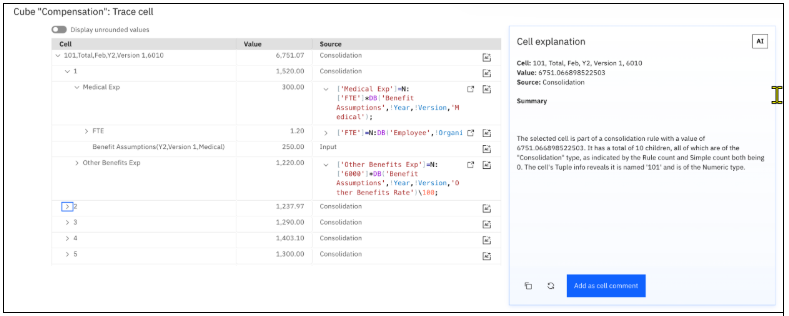
- Use AI to generate cell explanations
The new Explain Cell feature has been added to AI. This uses generative AI to summarise the cell intersection, underlying logic of the cell value and source type.
Important: The Explain Cell feature is part of the Planning Analytics AI assistant add-on which requires a separate licence purchase. To purchase a licence please contact your IBM Sales rep or got directly to your IBM Account