The next PAW cloud upgrade is occurring tonight July 24th
The link to the changes is below
What’s coming next in IBM Planning Analytics 2.0.89 SC
The link to the Defect resolution is below
IBM Planning Analytics 2.0 Fix Lists
Deprecation notices – as advised last time
- Classic cube viewer to be removed from Planning Analytics Workspace 2.0.90
As of Planning Analytics Workspace 2.0.90, the classic cube viewer will be removed from Planning Analytics Workspace.
Any existing classic cube viewer will be converted to a new experience cube viewer when first opened in Planning Analytics Workspace 2.0.90. GQ comment – I am not sure whether existing classic views in books will be affected
Key callout for this upgrade – (for me at least ????)
Duplicate cubes in the cube viewer
The Duplicate button is now available on the cube viewer toolbar on the workbench.
Click on the Duplicate button to create a duplicate of the current cube view. This button is located between the Sandbox discard button and the Cube rules button.
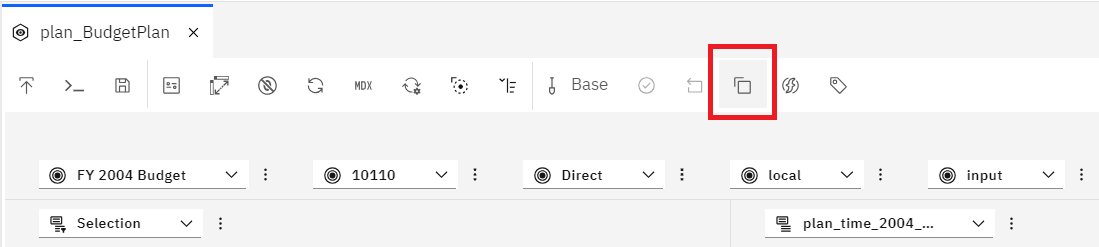
The newly duplicated cube view opens in a new tab, and the information in the duplicate includes the latest changes made in the cube.
This feature is also available in a pop out window. When you duplicate a cube in a pop out window, the duplicated cube opens in a new pop out window.
Changes in Books and Reporting
- new Selector visualization in place of selector widgets in your books
In Planning Analytics Workspace 2.0.89, a new Selector visualization is available to replace selector list and selector tile widgets in books.
Important: The new Selector visualization is partially subject to enablement by a Planning Analytics Workspace administrator. If an administrator does not explicitly enable the new Selector visualization feature, selector list and selector tile widgets in books remain unchanged until the enablement release for this feature. GQ – I guess we will need to check the Administration / Features and Configuration tab after the implementation as the option is not showing at the moment.
When the new Selector visualization feature is enabled, any existing selector list or selector tile widget in a book is converted to a Selector visualization when you open the book. The visualization is styled to most closely replicate the widget it replaces.
Regardless of the enablement status of the new Selector visualization feature, Selector visualizations can be created from the Visualization pane in Planning Analytics Workspace 2.0.89.
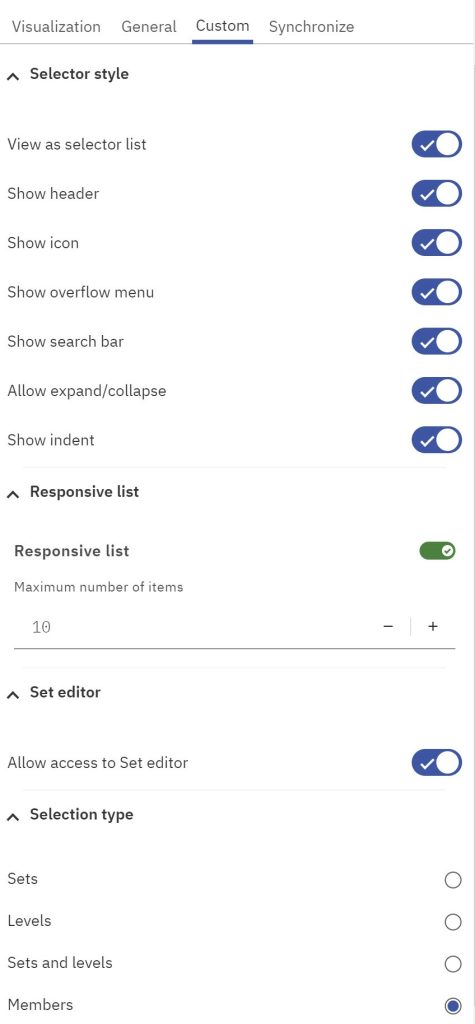
The Selector visualization behaves much as selector list and selector tile widgets did, but there are multiple Custom visualization properties that you can apply to tailor the visualization for your purposes.
There are several ways to insert a Selector visualization into a book. In all cases, the book must be in Edit mode.
- From the Datatree:
- On the Datatree, fully expand the Dimensions node beneath the cube for which you want to create a Selector visualization. You can create a Selector only from the Dimensions node beneath a cube. You can’t create a Selector from the main Dimensions node.
- Right-click the dimension, hierarchy, or subset that you want to use as a Selector.
- Click Add as selector.
- From the Visualizationspane:
- Click the Visualizationsicon to open the pane.
- Click the Selector
- From the Datatree, drag and drop a dimension, hierarchy, set, or level onto the visualization placeholder.
- From an exploration, click the dimension tile that you want to use as a selector, then drag the dimension to an empty space on the book.
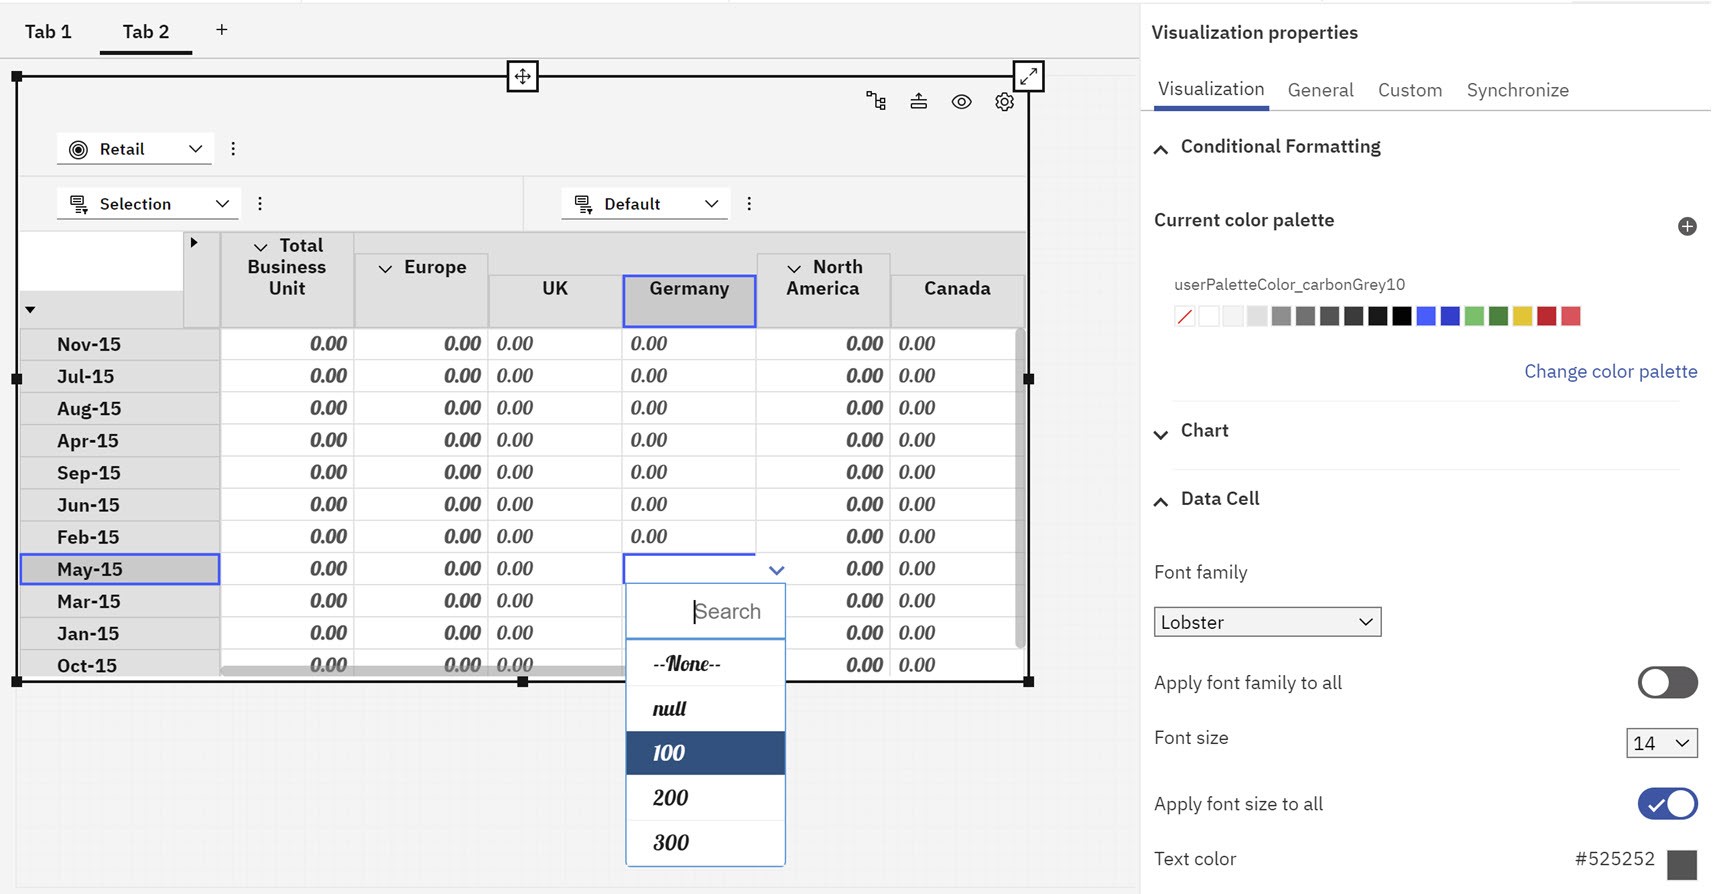
- Pick lists now use the font defined for data cells in an exploration
In previous versions of Planning Analytics Workspace, pick list cell values and list members were displayed with the default IBM Plex font.
As of Planning Analytics Workspace2.0.89, pick lists cells and pick list members use the font defined for the exploration by the Data cell font family property.
This example shows an exploration, including pick list cells and the pick list members, using the Lobster font.
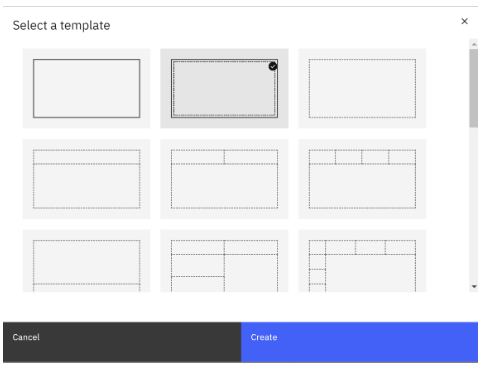
- Resize books to fill space in a tab
You can now resize a book in a tab that contains the full width and height within different window sizes with the new Fill space feature.
Previously, the aspect ratio of the book and its contents was maintained. Now, all the contents in a book fit perfectly within the browser window and the aspect ratio setting is ignored.
You can apply the Fill space feature in several places: when creating a new book with tabs, a new book from a Fill space template, and in Properties.
Note: When you save Views or Websheets, they are saved as a Fill space layout by default.
Fill space in book tabs
You can apply the Fill space feature when creating a new book.
- From the Homemenu, click + New > Book.
- In Editmode, click Tab 1 then click Change template.
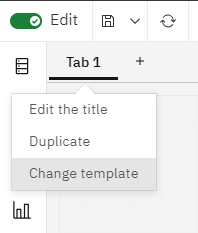
Click the second template in the first row, then click Create to change the layout to Fill space.
Changes in Plans and Applications
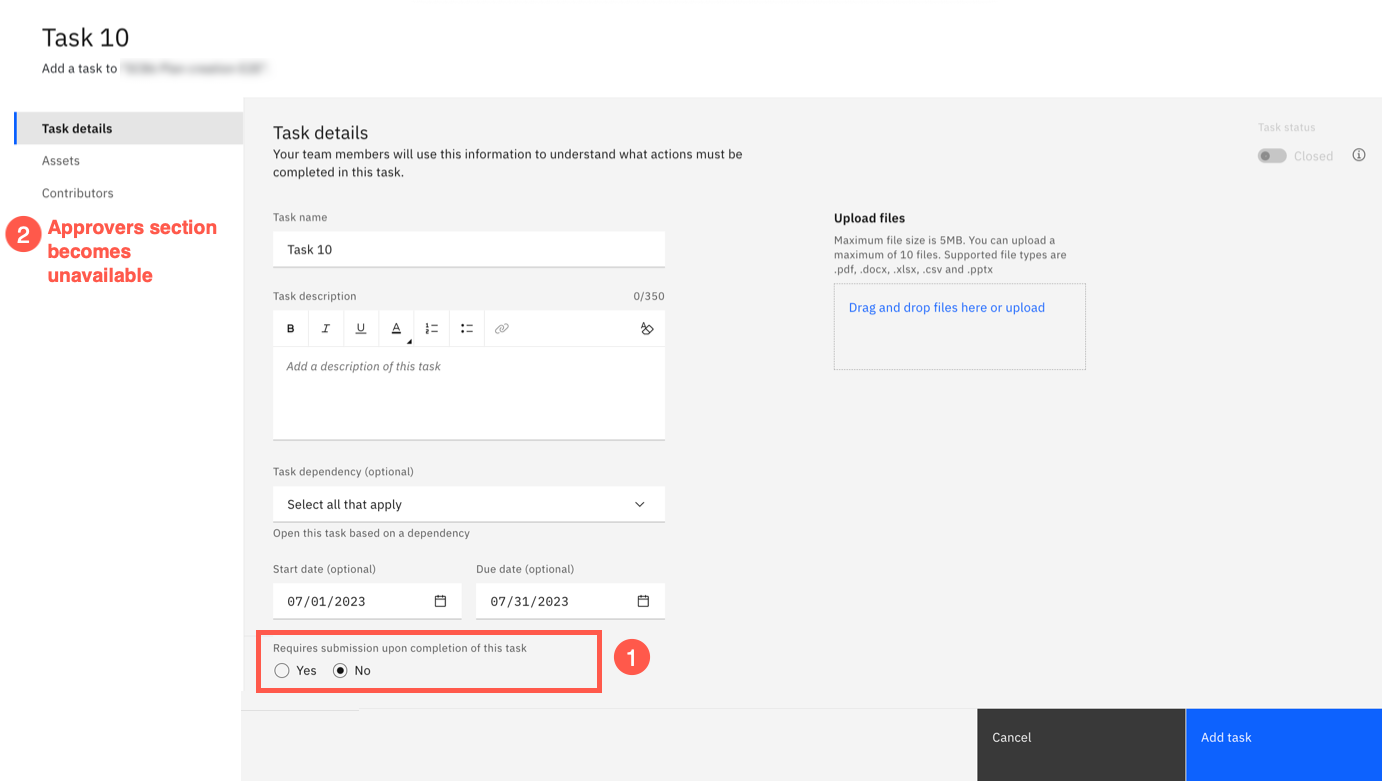
- Complete button for tasks that do not require submission
A Complete button is now available on the contribution page in tasks that do not require submission. Previously, if a task in a plan did not require submission, there was no way to indicate that the task was complete.
Plan owners and administrators can configure a task to not require a submission.
When a submission is not required:
- The Approvers section becomes unavailable in the task creation page
Changes in Modelling
- Synchronize user groups in Planning Analytics databases with Planning Analytics Workspace
Administrators and modelers can now synchronize user groups that are in a Planning Analytics database with the groups in Planning Analytics Workspace from the modeling workbench.
Important: You cannot synchronize the predefined groups ADMIN, DataAdmin, SecurityAdmin, and OperationsAdmin.
- In a modeling workbench, right-click a database on the Databasestree and select Manage users and groups.
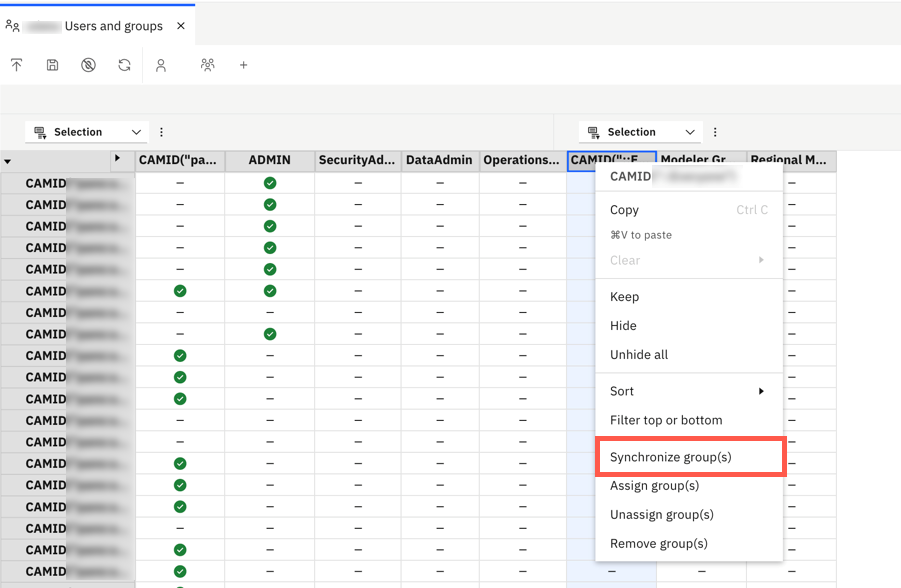
- In the Users and groupseditor, right-click a group and select Synchronize groups.
Memberships of the group in the database now match those of the same group that exists in Planning Analytics Workspace.
Additionally, when you synchronize a group, existing users in the Planning Analytics Workspace group that are not in the database are also added to the database.
Note: Synchronization does not remove any new users that were added to the group in the database.